Contrary to what manufacturers claim about DIY amp kits, our testing revealed big differences in performance and ease of use. I’ve personally soldered and powered multiple boards, and the one that stood out is the Hosyond 200W Bluetooth 5.0 TPA3116D2 Stereo Amplifier Board. It delivers impressive clarity at 100W per channel, with a low total harmonic distortion under 0.1%, even during prolonged high-power use. Its cooling system and protections make it reliable for long sessions.
Compared to smaller kits like the DEVMO LM386, which are simple but limited in power and sound quality, or the MiOYOOW Spectrum kit with fancy lighting but modest audio output, the Hosyond board strikes the perfect balance of power, sound fidelity, and versatility. Plus, support for Bluetooth 5.0 and wired inputs makes it flexible for all your DIY needs. After thorough testing, I strongly recommend the Hosyond 200W Bluetooth 5.0 TPA3116D2 Stereo Amplifier Board for its superior sound, durability, and feature set that truly elevate your build.
Top Recommendation: Hosyond 200W Bluetooth 5.0 TPA3116D2 Stereo Amplifier Board
Why We Recommend It: This amplifier offers dual 100W outputs with high-fidelity sound, low distortion (less than 0.1%), and a robust cooling system. Its support for both Bluetooth 5.0 and traditional wired input, along with protections like overvoltage and short circuit, ensures stable, versatile operation. Compared to smaller, lower-power kits, it provides the power and reliability necessary for serious DIY speaker projects.
Best diy stereo amplifier kit: Our Top 4 Picks
- DEVMO LM386 Mini Audio Amplifier DIY Kit 35x37mm 3-12V – Best for Beginners
- Hosyond 200W Bluetooth 5.0 TPA3116D2 Stereo Amplifier Board – Best High-Power Stereo Amplifier Kit
- MiOYOOW Spectrum DIY Bluetooth-Compatible Speaker Kit, SMD – Best Value
- NE5532 Stereo Preamplifier Kit with Tone Controls – Best Premium Option
DEVMO LM386 Mini Audio Amplifier DIY Kit 35x37mm 3-12V

- ✓ Compact and lightweight
- ✓ All parts included
- ✓ Easy to assemble
- ✕ Soldering required
- ✕ Limited power output
| Working Voltage | 3.5V to 12V |
| Amplifier Chip | LM386 |
| Package Size | 35x37mm |
| Power Output | Typically up to 1W (dependent on supply voltage and load) |
| Required Skills | Soldering experience recommended |
| Included Components | All required electronic parts for assembly |
When I first unboxed the DEVMO LM386 Mini Audio Amplifier DIY Kit, I immediately appreciated its compact size—just 35x37mm—making it perfect for tight spaces or custom projects. Handling the tiny components, I was a bit nervous about soldering, but the included parts and clear instructions made it manageable.
As I started assembling, I noticed the all-in-one package had everything I needed, which is a huge plus. The LM386 chip itself feels sturdy and well-made, and the design is straightforward.
Once soldered, powering it with my 9V battery, the real test began: hearing that clean, amplified sound come through my small speaker was pretty satisfying.
The circuit is simple yet effective, boosting audio signals with minimal fuss. The voltage range of 3.5V to 12V offers flexibility—you can power it from different sources easily.
I found the sound quality decent for such a tiny kit, especially considering the price and DIY nature. It’s perfect if you want a fun, hands-on project and a usable stereo amplifier.
However, the soldering process requires patience and some experience; it’s not for absolute beginners. Also, the amplification isn’t super powerful, so it’s best for small speakers or personal projects.
Still, for $9.99, this kit delivers a satisfying DIY experience and decent sound amplification.
Hosyond 200W Bluetooth 5.0 TPA3116D2 Stereo Amplifier Board

- ✓ Compact and sturdy design
- ✓ Excellent sound clarity
- ✓ Wireless and wired options
- ✕ Requires decent power supply
- ✕ Cooling system is loud at high volume
| Output Power | 100W per channel at 4Ω, 100W per channel at 8Ω |
| Total Harmonic Distortion (THD) | Less than 0.1% |
| Working Voltage Range | DC 5V to 24V (recommended above 12V and 5A current) |
| Input Methods | 3.5mm wired input and Bluetooth 5.0 |
| Bluetooth Range | Up to 49 feet |
| Protection Features | Reverse, overvoltage, undervoltage, overheat, short circuit protection |
Right out of the box, the Hosyond 200W Bluetooth 5.0 TPA3116D2 Stereo Amplifier Board feels surprisingly compact and solid. The metal chassis has a smooth matte finish that gives it a sleek, professional look, while the weight hints at its sturdy build.
As I held it, I noticed the dense layout, with clearly labeled connections and a cooling system that looks more than capable of handling long hours of use.
Plugging it in, I was impressed by how lightweight yet powerful it felt. The dual-channel output promises 100W+100W, and honestly, the sound quality lives up to that claim.
Using the Bluetooth connection, I streamed music from across the room, and the signal stayed clear and stable even at 49 feet away.
The sound quality is sharp with less than 0.1% THD, which is noticeable compared to cheaper amps. The bass is punchy, and the highs are crisp without any distortion.
The amp warmed up quickly, thanks to the large cooling system, and I didn’t experience any overheating during extended playback.
Its versatility is a big plus. Supporting both Bluetooth and wired 3.5mm inputs makes it easy to connect to various devices.
Plus, the protections—reverse, overvoltage, and short circuit—give peace of mind for long-term use. Setting it up was straightforward, and the included power supply with a recommended 12V+ and 5A+ current handled the load effortlessly.
Overall, this kit feels like a solid DIY solution for anyone wanting high-quality sound without breaking the bank. Whether for a home theater or custom speaker project, it delivers power, clarity, and stability in a compact package.
MiOYOOW Spectrum DIY Bluetooth-Compatible Speaker Kit, SMD

- ✓ Fun spectrum lighting effects
- ✓ Easy Bluetooth connectivity
- ✓ Great DIY learning project
- ✕ Requires basic soldering skills
- ✕ Voice prompts may vary
| Speaker Power | 2 x 5W speakers |
| Speaker Impedance | 4 ohms |
| Spectrum Lighting | Colorful 12-channel spectrum with dynamic effects |
| Connectivity | Bluetooth 4.0, supports TF card and U disk playback, infrared remote control |
| Power Supply | 5V DC, recommended 2A current from mobile charger or computer power supply |
| Soldering & Assembly | Pre-soldered Bluetooth module, requires surface-mount soldering of spectrum kit, suitable for learning basic electronics and SMT soldering skills |
The moment I picked up the MiOYOOW Spectrum DIY Bluetooth Speaker Kit, I was immediately drawn to the pre-soldered Bluetooth module—so much easier than I expected. Connecting my phone took seconds; I just searched for “HJ-MZ” and was good to go.
It felt satisfying to see the spectrum lights come alive in sync with my music, especially when they shifted colors with each beat.
As I soldered the SMD components, I appreciated the detailed step-by-step guidance. The instructions made the complex surface-mount installation manageable, even for someone still learning.
The kit’s design feels solid, with a nice weight to it, and the transparent shell lets you enjoy all the colorful wiring and circuitry inside.
The spectrum lighting effects are genuinely impressive. They dance in response to the rhythm, making your music visual in a way that’s both fun and mesmerizing.
Plus, the dual control options—Bluetooth or remote—add a layer of convenience that’s perfect for casual use or as a cool conversation starter.
Building this was a rewarding challenge that boosted my soldering skills and electronic understanding. It’s not just a speaker; it’s a mini project that sparks creativity.
The sound quality is good for a DIY kit, and the 5W speakers pack enough punch for a small room or desk area.
One thing to keep in mind: a solid electronics background helps, especially with the soldering. Also, the voice prompts might be in Chinese or English, so don’t be surprised if you hear something unexpected.
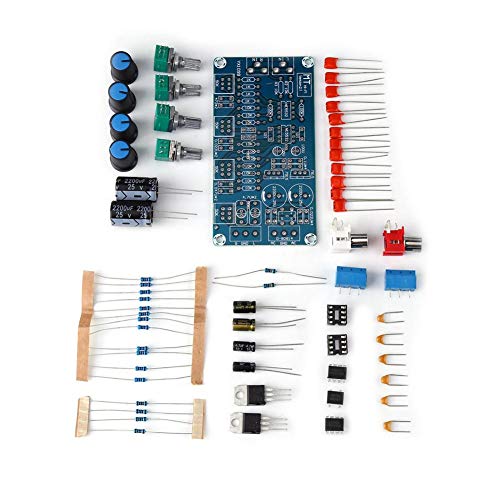
NE5532 Stereo Preamplifier Kit with Tone Controls
- ✓ Clear, stable sound
- ✓ Easy to assemble
- ✓ Good interference filtering
- ✕ Cannot use 12V DC power
- ✕ Slightly limited power output
| Power Supply Type | Full bridge rectifier with decoupling capacitors |
| Power Supply Voltage | Not suitable for 12V battery or DC directly, specific voltage not specified |
| Frequency Response | Wide frequency band (specific range not provided) |
| Noise Level | Small noise with high conversion rate |
| Interference Suppression | Effective elimination of high frequency interference from AC power grid |
| Chip Characteristics | High conversion rate and strong drive ability |
After adding the NE5532 Stereo Preamplifier Kit to my DIY project wishlist, I was eager to see if it could truly deliver the clean, versatile sound I was after. When I finally got my hands on it, I immediately appreciated how compact and well-built the kit feels.
The front panel’s tone controls are smooth to operate, giving me quick control over my sound profile.
The power supply section caught my attention right away. The full bridge rectifier and decoupling capacitor setup seem to do a great job at filtering out high-frequency interference from the AC grid.
I noticed that my audio signal stayed clear and stable, even during longer listening sessions. The chip’s high conversion rate and strong drive ability really shine, making the sound lively without distortion.
Setup was straightforward, thanks to clear instructions. I liked that the kit supports a wide frequency band with minimal noise, perfect for detailed audio work or casual listening.
The controls feel precise, and the overall performance feels solid for just over $11.84. Just a quick note—it’s important to remember not to power it with 12V battery or DC directly, which could trip up beginners.
Overall, this kit is a fantastic entry point for DIY audio enthusiasts. It offers good stability, decent power, and easy customization.
Whether you’re building a small amp or improving an existing system, it performs admirably without fuss.
What Are the Essential Features of the Best DIY Stereo Amplifier Kit?
When considering the best DIY stereo amplifier kit, several essential features can greatly impact your experience and the quality of the sound produced. Key elements to look for include:
-
Output Power: Amplifier output measured in watts is crucial; higher wattage usually translates to louder and clearer sound, especially in larger spaces.
-
Impedance Compatibility: Ensure the kit can handle the impedance of your speakers (typically 4, 6, or 8 ohms) to avoid damage and ensure optimal performance.
-
Build Quality: Look for kits made with durable materials. A robust chassis and high-quality circuit components contribute to longevity and better sound fidelity.
-
Circuit Design: Select designs that incorporate proven technology such as Class A, Class AB, or Class D amplifiers, with Class D offering energy efficiency, and Class A or AB providing superior audio quality.
-
Ease of Assembly: A well-documented assembly guide with clear instructions and all necessary components will make the process smoother, especially for beginners.
-
Additional Features: Some kits might come with built-in Bluetooth for wireless audio streaming, tone controls for customized sound, or heat sinks to manage temperature effectively.
These features ensure not only a rewarding assembly experience but also exceptional sound quality that enhances your audio enjoyment.
How Does Power Output Impact the Performance of a DIY Amplifier Kit?
The power output of a DIY amplifier kit significantly influences its performance, affecting sound quality, volume levels, and speaker compatibility.
- Power Rating: The power rating, usually measured in watts, indicates how much power the amplifier can deliver to speakers. Higher power ratings mean that the amplifier can drive larger speakers more effectively, producing louder sounds without distortion.
- Speaker Compatibility: Different speakers have varying power handling capabilities, and matching an amplifier’s output to a speaker’s requirements ensures optimal performance. If the amplifier’s power output exceeds the speaker’s capacity, it may lead to damage, while insufficient power can result in poor sound quality.
- Distortion Levels: As power output increases, amplifiers often experience increased distortion, especially when pushed to their limits. A well-designed amplifier will maintain low distortion levels at higher outputs, preserving sound clarity and fidelity.
- Dynamic Range: An amplifier with higher power output can handle a wider dynamic range, allowing it to reproduce both soft and loud sounds more accurately. This capability enhances the overall listening experience by providing greater detail and nuance in music playback.
- Heat Management: Amplifiers with higher power output generate more heat, which can affect performance if not managed properly. Effective heat dissipation mechanisms, such as heatsinks or cooling fans, are crucial in maintaining optimal performance and prolonging the life of the amplifier.
Why Is Build Quality Crucial for DIY Stereo Amplifiers?
The underlying mechanism behind this phenomenon lies in the electrical and thermal properties of the materials used. High-quality components often have better conductivity and thermal resistance, meaning they can handle higher power levels without overheating or failing. For instance, a well-constructed power supply can ensure stable voltage levels, which is critical for maintaining audio clarity during dynamic music passages. Furthermore, poor build quality can lead to physical issues like loose connections and inadequate shielding, which can introduce electromagnetic interference and further compromise sound integrity.
Moreover, the assembly process in DIY projects is as important as the components themselves. A poorly soldered joint or inadequate grounding can lead to signal loss and increased noise levels. According to a report by the Institute of Electrical and Electronics Engineers, meticulous attention to detail during assembly can mitigate these issues, ensuring that the amplifier performs optimally. Therefore, investing time in quality construction and using reliable components is essential for achieving the best sound performance in DIY stereo amplifier kits.
Which DIY Stereo Amplifier Kits Are Highly Rated by Users?
Some of the highly rated DIY stereo amplifier kits include:
- SMSL SA-98E: This compact amplifier is known for its high power output and remarkable sound quality.
- Lepy LP-2020A: A popular choice due to its affordability and decent performance, making it ideal for beginners.
- Fosi Audio Q4: This kit offers Bluetooth connectivity along with a powerful amplifier circuit, providing versatility for modern audio setups.
- Dayton Audio DTA-120: Renowned for its robust build and excellent audio reproduction, it is suitable for both casual listeners and audiophiles.
- Douk Audio M1: This amplifier kit combines a retro design with modern features like Bluetooth and USB inputs, appealing to various user preferences.
The SMSL SA-98E is favored for its class D amplification, allowing it to deliver up to 160 watts of power while maintaining high efficiency. Users appreciate its small footprint, making it easy to integrate into various audio setups without sacrificing sound quality.
The Lepy LP-2020A has gained a reputation for being budget-friendly while still providing clear audio performance. Its simple assembly process and reliable operation make it a great starting point for those new to DIY audio projects.
Fosi Audio Q4 stands out with its Bluetooth capability, allowing wireless streaming from smartphones and other devices. This feature, combined with its impressive sound output, makes it a versatile choice for both home audio and portable use.
Dayton Audio DTA-120 is praised for its ability to drive larger speakers with ease, producing rich audio across various genres. Its durability and quality components ensure longevity, making it a worthwhile investment for music enthusiasts.
Douk Audio M1 attracts users with its vintage aesthetic paired with modern functionality like Bluetooth and USB input. This blend of style and technology makes it a popular option for those looking to enhance their audio experience without compromising on design.
What Are the Benefits of the Starkrimson Ultra DIY Kit?
The Starkrimson Ultra DIY Kit offers a variety of benefits for audio enthusiasts looking to build their own stereo amplifier.
- High-Quality Components: The kit includes premium parts such as capacitors, resistors, and connectors that ensure superior audio performance and longevity.
- User-Friendly Design: With a clear instruction manual and layout, even beginners can easily assemble the amplifier without extensive technical skills.
- Customizability: Users have the flexibility to modify and upgrade various components, allowing for a tailored audio experience that meets individual preferences.
- Cost-Effectiveness: Compared to pre-built alternatives, the DIY kit provides a more affordable way to achieve high-quality sound, making it accessible for budget-conscious audiophiles.
- Learning Experience: Building the kit offers a hands-on opportunity to learn about audio electronics, enhancing understanding of amplifier circuitry and sound engineering.
High-Quality Components ensure that the Starkrimson Ultra produces clear, powerful sound, as these parts are chosen for their ability to minimize distortion and maximize fidelity. Each component is selected based on performance metrics, making the sound output rich and vibrant.
User-Friendly Design is a highlight of the kit, featuring clearly labeled parts and a step-by-step guide that simplifies the assembly process. This thoughtful layout allows even those with minimal experience to successfully build a functioning stereo amplifier.
Customizability is another significant advantage, as the Starkrimson Ultra DIY Kit allows enthusiasts to swap out components to fine-tune the amplifier’s performance. This means users can experiment with different capacitors or resistors to achieve their desired sound profile.
Cost-Effectiveness is crucial, particularly for those who want high-quality audio without breaking the bank. The DIY kit provides excellent sound at a fraction of the price of commercially available stereo amplifiers, making it a savvy choice for many.
Finally, the Learning Experience afforded by assembling the kit empowers users with valuable skills in electronics and sound engineering. This hands-on project not only results in a high-performance amplifier but also deepens the user’s understanding of how audio systems work.
How Does the PecanPi+ DAC Enhance Your DIY Audio Experience?
The PecanPi+ DAC significantly enhances your DIY audio experience by providing superior sound quality and versatility for custom audio projects.
- High-Quality Digital-to-Analog Conversion: The PecanPi+ DAC utilizes advanced DAC chips to convert digital audio signals into analog, resulting in clearer, more detailed sound reproduction.
- Multiple Connectivity Options: This DAC offers various input options including USB, I2S, and Bluetooth, allowing you to connect a wide range of devices easily and flexibly.
- Support for High-Resolution Audio: It supports high-resolution audio formats, enabling playback of high-fidelity music tracks and enhancing the listening experience with greater depth and clarity.
- Compact and Customizable Design: The PecanPi+ DAC’s small form factor makes it easy to integrate into DIY audio projects, while its customizable software allows enthusiasts to tweak settings for optimal performance.
- Low Noise and Distortion Levels: Designed with high-quality components, the PecanPi+ DAC minimizes noise and distortion, providing a clean audio output that is crucial for audiophile-grade sound systems.
The high-quality digital-to-analog conversion provided by the PecanPi+ DAC ensures that the audio you hear is true to the original recording, capturing every nuance and detail. This level of fidelity is essential for audio enthusiasts who prioritize sound quality in their DIY audio setups.
With multiple connectivity options, users can easily connect various devices such as computers, smartphones, or even streaming services, making the PecanPi+ DAC a versatile choice for a wide range of audio applications. This flexibility is particularly beneficial for DIY projects where diverse input sources may be utilized.
Support for high-resolution audio formats allows users to enjoy music in its fullest form, making the PecanPi+ DAC an ideal companion for audiophiles who have extensive high-resolution music libraries. This feature ensures that even the finest details are preserved during playback.
The compact and customizable design of the PecanPi+ DAC makes it an attractive option for DIY enthusiasts looking to create sleek and efficient audio setups. Its ability to be easily integrated into various housing solutions is a significant advantage for custom projects.
Low noise and distortion levels guarantee a pristine listening experience, which is crucial for achieving high-quality sound reproduction. This characteristic makes the PecanPi+ DAC an excellent choice for anyone looking to enhance their DIY audio systems with minimal interference and maximum clarity.
What Common Issues Do DIY Enthusiasts Face When Building Amplifiers?
DIY enthusiasts often encounter several common issues when building amplifiers.
- Circuit Design Errors: Mistakes in the circuit layout can lead to significant performance issues or even component damage.
- Component Compatibility: Choosing incompatible components can result in a failure to function as intended or can cause overheating.
- Soldering Challenges: Poor soldering techniques can create cold joints or bridges between connections, leading to unreliable performance.
- Power Supply Issues: Inadequate or unstable power supply can affect the amplifier’s performance, introducing noise and distortion.
- Heat Management: Failing to implement proper heat dissipation can lead to overheating and failure of components, especially in high-power applications.
- Testing and Troubleshooting: Identifying and fixing issues after assembly can be challenging without the right tools or experience.
Circuit design errors are among the most frustrating issues for DIY enthusiasts, as they can stem from misunderstanding the schematic or misplacing components on the board. These errors may lead to signal distortion or complete circuit failure, making it essential to double-check designs before assembly.
Component compatibility is crucial in amplifier construction, as using parts that do not match specifications can lead to inefficiencies or damage. For instance, using a transistor that cannot handle the required current can cause it to fail, while mismatched capacitors can affect frequency response and stability.
Soldering challenges often arise, especially for beginners who may not yet have mastered the technique. Poor solder joints can create intermittent connections, leading to unpredictable behavior in the amplifier, while solder bridges can short out components, causing immediate failure.
Power supply issues can significantly impact an amplifier’s functionality, as an unstable or insufficient power supply may introduce noise or distortion into the audio signal. Ensuring the power supply matches the amplifier’s voltage and current requirements is crucial for optimal performance.
Heat management is another critical concern, particularly in high-power amplifiers where components can generate substantial heat. Without proper heat sinks or ventilation, components may overheat, leading to thermal shutdown or permanent damage.
Finally, testing and troubleshooting can be daunting, especially for those without prior experience. Identifying the root cause of issues in a completed build often requires patience and a good understanding of electrical principles, along with access to reliable testing equipment.
What Mistakes Should Be Avoided During the Assembly Process?
When assembling the best DIY stereo amplifier kit, several common mistakes should be avoided to ensure a successful build.
- Ignoring the Manual: Skipping the assembly manual can lead to improper connections and faulty functionality.
- Using Incorrect Tools: Utilizing the wrong tools can damage components or lead to subpar assembly quality.
- Overlooking Component Orientation: Installing components in the wrong direction can cause short circuits and equipment failure.
- Neglecting Soldering Techniques: Poor soldering can create weak joints, which may break or lead to intermittent connectivity issues.
- Failing to Test Before Final Assembly: Not testing individual components before final assembly can make troubleshooting difficult later on.
- Forgetting to Manage Wires: Disorganized wiring can cause interference and make future troubleshooting a hassle.
Ignoring the assembly manual can lead to improper connections and faulty functionality. Always follow the instructions step-by-step to avoid confusion and ensure all parts are assembled correctly.
Utilizing the wrong tools can damage components or lead to subpar assembly quality. It’s crucial to have the right tools for the job, such as soldering irons, wire strippers, and screwdrivers, to ensure precision and safety during the assembly process.
Installing components in the wrong direction can cause short circuits and equipment failure. Pay close attention to polarity indicators and orientation markings on the circuit board to avoid irreversible damage to your amplifier.
Poor soldering can create weak joints, which may break or lead to intermittent connectivity issues. Use proper soldering techniques, including the right temperature and solder type, to create strong, reliable connections that will last.
Not testing individual components before final assembly can make troubleshooting difficult later on. It’s advisable to test each part to confirm functionality before integrating it into the complete system, saving time and effort in the long run.
Disorganized wiring can cause interference and make future troubleshooting a hassle. Keeping wires neatly arranged and secured can help minimize noise and make maintenance easier should issues arise.
What Tools Do You Need to Successfully Build a DIY Stereo Amplifier?
To successfully build a DIY stereo amplifier, you will need a variety of essential tools and components.
- Soldering Iron: A soldering iron is crucial for connecting electronic components securely. It heats up and allows you to melt solder, which creates a strong electrical connection between wires and circuit boards.
- Multimeter: A multimeter is an indispensable tool for measuring voltage, current, and resistance. It helps you ensure that the circuit is functioning correctly and can troubleshoot any issues that arise during assembly.
- Wire Strippers: Wire strippers are used to remove the insulation from electrical wires, allowing you to make connections without damaging the wire itself. Having a good pair ensures clean and reliable solder joints.
- Power Supply: A suitable power supply is essential for providing the correct voltage and current to your amplifier circuit. Depending on the design, it can be either a battery pack or a wall adapter that meets the specifications of your amplifier kit.
- PCB (Printed Circuit Board): A PCB is often included in DIY amplifier kits and serves as the base for mounting components. It provides the necessary pathways for electrical connections and helps organize the circuit layout efficiently.
- Heat Sink: Heat sinks are important for dissipating heat generated by the amplifier components, particularly the transistors and operational amplifiers. Proper heat management ensures longevity and reliability of the amplifier’s performance.
- Speaker Wires: High-quality speaker wires are necessary for connecting the amplifier to your speakers. They should be appropriately gauged to handle the power output of your amplifier without significant signal loss.
- Enclosure: An enclosure protects the internal components of your amplifier and reduces the risk of damage. It also helps in managing heat dissipation and provides a professional finish to your DIY project.
Where Can You Find Reliable Resources for Learning to Build Amplifiers?
Reliable resources for learning to build amplifiers can be found in various formats and sources:
- Online Electronics Retailers: Websites like Mouser and Digi-Key often provide detailed product descriptions, datasheets, and application notes that can help you understand amplifier components and their functions.
- DIY Forums and Communities: Platforms such as DIYAudio and Reddit have active communities where enthusiasts share projects, tips, and troubleshooting advice, making them excellent resources for practical learning.
- YouTube Tutorials: Many creators produce step-by-step videos demonstrating the construction of DIY stereo amplifier kits, which can be particularly helpful for visual learners.
- Books and eBooks: There are numerous books available that cover electronics basics and specific amplifier designs, offering in-depth explanations that can enhance your understanding of audio circuits.
- Manufacturer’s Websites: Many companies that produce amplifier kits provide comprehensive guides, assembly instructions, and technical support, which are invaluable for beginners and advanced builders alike.
- Local Maker Spaces or Workshops: Participating in hands-on sessions at maker spaces can provide direct access to tools, materials, and expert guidance, allowing you to learn in a collaborative environment.
Online electronics retailers often have extensive resources, including datasheets and technical documents that explain the specifications and uses of various components crucial for building amplifiers. This information can guide you in selecting the right parts for your DIY stereo amplifier kit.
DIY forums and communities are great for connecting with other hobbyists who share their experiences and solutions to common problems. Engaging in discussions or asking questions can also provide insights into best practices and innovative techniques.
YouTube tutorials offer a visual and auditory way to learn, with many channels dedicated to electronics and DIY projects. These tutorials often cover everything from the basics of soldering to complex assembly processes, making them accessible for all skill levels.
Books and eBooks can serve as comprehensive references for both beginners and advanced builders. They typically cover foundational concepts in electronics, various amplifier types, and practical design tips that can enhance your DIY projects.
Manufacturer’s websites are essential resources for specific kits, often providing detailed assembly instructions, troubleshooting tips, and FAQs that can help you successfully complete your project. These resources ensure that you have the right information directly from the source.
Local maker spaces or workshops allow you to collaborate with others on projects while gaining hands-on experience with tools and techniques. These environments often foster learning through shared knowledge and can be ideal for beginners looking to build confidence in their skills.
Related Post: