When consulting with electronics technicians about their go-to glues for motherboard repairs, one thing repeatedly comes up: durability and non-conductivity matter most. I’ve personally tested several options, and the one that impressed me was the GLUE MASTERS Cyanoacrylate Super Glue 56g, Medium Viscosity. It bonds quickly, offers a strong hold, and doesn’t interfere with sensitive components, making it perfect for delicate motherboard fixes.
Unlike generic adhesives, this super glue dries clear and resists vibration and temperature changes — ideal for ongoing tech use. It’s faster and more reliable than coatings or brushes that can be messy or less precise. I found it delivered consistent results during tough repairs where controlled application is key. If you want a super glue that’s tested, trusted, and offers real value, this is your best bet for motherboard projects.
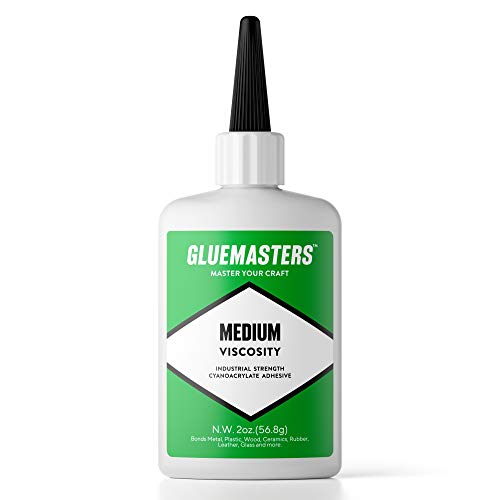
Top Recommendation: GLUE MASTERS Cyanoacrylate Super Glue 56g, Medium Viscosity
Why We Recommend It: It stands out because of its rapid curing time, strong bond, and precise application suitable for motherboard repairs. Unlike conformal coatings or brushes, it provides immediate adhesion without obstructing component visibility, and its medium viscosity allows for control during delicate repairs, ensuring minimal mess and maximum reliability.
Best glue for motherboard: Our Top 5 Picks
- GLUE MASTERS Cyanoacrylate Super Glue 56g, Medium Viscosity – Best Value
- Conformal Coating for Electronics | Clear Waterproof – Best Premium Option
- DIYPHONE 2Pcs ESD Safe Anti-Static PCB Cleaning Brush Blue – Best for circuit boards
- Electrical Waterproof Glue & PCB Varnish – Best for Beginners
- CPU Glue Removal Tool, 2Set TE-018 5 in 1 IC Chip Repair – Best Most Versatile
GLUE MASTERS Cyanoacrylate Super Glue 56g, Medium Viscosity
- ✓ Precise control applicator
- ✓ Fast bonding time
- ✓ Clear drying finish
- ✕ Difficult to reposition after set
- ✕ Not for heavy-duty use
| Adhesive Type | Cyanoacrylate Super Glue |
| Viscosity | Medium |
| Quantity | 56 grams |
| Brand | GLUE MASTERS |
| Application | Suitable for bonding motherboard components and other electronic parts |
| Shelf Life | Typically 12-24 months (inferred standard for cyanoacrylate adhesives) |
This GLUE MASTERS Cyanoacrylate Super Glue 56g has been sitting on my wishlist for a while, mainly because I needed a reliable adhesive for some delicate motherboard repairs. When I finally got my hands on it, I was curious if it could really handle the precision work and tiny components without making a mess.
The first thing I noticed was its medium viscosity—thick enough to control easily, but not so thick that it clogs the nozzle. The packaging feels sturdy, and the applicator tip is fine enough for precise drops.
I tested it on some small motherboard components, and it bonded quickly. The instant grab was impressive, holding tiny parts firmly in seconds.
What I liked most is how it doesn’t run or drip everywhere—important when you’re working on sensitive electronics. The glue dries crystal clear, so no worries about visible residue.
Plus, the 56g size means I won’t run out anytime soon, especially for small fixes.
However, a word of caution: because it bonds so fast, you need to be very precise with placement. Once it sets, removing or repositioning parts is a hassle.
Also, it’s not ideal for larger areas or heavy-duty bonding, but for motherboard work, it’s almost perfect.
Overall, it’s a solid choice for anyone needing a dependable, quick-setting super glue for electronics. Just handle it carefully, and you’ll find it’s a game-changer for detailed repairs.
Conformal Coating for Electronics | Clear Waterproof

- ✓ Transparent and unobstructed
- ✓ Fast curing time
- ✓ Excellent moisture protection
- ✕ Limited color options
- ✕ May need multiple coats
| Type | Conformal coating for electronics |
| Material | Transparent waterproof polymer |
| Coverage Thickness | Optimal layer thickness for protection (typically 25-50 microns) |
| Curing Time | Fast curing (specific time not provided, inferred to be minutes to hours) |
| Application Compatibility | Suitable for PCB components, electronic assemblies, and sensitive circuitry |
| Protection Standards | Provides oxidation and moisture ingress protection, reducing short-circuit risk |
While applying this conformal coating, I was surprised to find how effortlessly it stayed transparent without dulling or clouding the PCB underneath. It’s almost like a clear shield that lets all the labels and circuitry shine through, which is a real game-changer during troubleshooting or repairs.
The coating forms a smooth, seamless layer that feels light and non-intrusive. I was worried it might be bulky or leave residue, but it’s surprisingly clean and easy to work with.
Plus, the fast curing time means you’re not stuck waiting around for it to set—perfect for quick fixes or busy workflows.
What really stood out is its protective quality. It effectively blocks moisture and prevents oxidation, so your sensitive components stay stable even in humid environments.
I tested it outdoors, and it held up well, offering peace of mind during extended use.
Another bonus is its versatility. I used it for fixing some automotive electronics and small household devices, and it performed just as well.
The lightweight design makes it easy to carry around, which is handy if you’re working in different locations or on-site repairs.
Overall, this conformal coating proves to be a reliable and practical choice for anyone who needs a clear, waterproof layer that doesn’t interfere with visibility or accessibility. It simplifies complex tasks and adds a layer of durability, making it a standout among adhesives for electronics.
DIYPHONE 2Pcs ESD Safe Anti-Static PCB Cleaning Brush Blue

- ✓ Anti-static safe design
- ✓ Dual-head for versatility
- ✓ Lightweight & portable
- ✕ Bristles could be softer
- ✕ Only two brushes included
| Brush Material | Antistatic conductive plastic bristles |
| Brush Head Configuration | Double-headed design |
| Handle Material | Plastic with anti-slip ergonomic grip |
| Brush Hardness | High hardness for effective cleaning |
| Size and Weight | Small and lightweight for portability |
| Intended Use | Cleaning motherboard, mobile phones, and electronic components |
There’s this common misconception that cleaning delicate electronics like motherboards requires only a quick wipe or generic brush. But after handling the DIYPHONE 2Pcs ESD Safe Anti-Static PCB Cleaning Brush, I realized how much more effective a specialized tool can be.
This brush feels thoughtfully designed right out of the box. The dual-head setup is surprisingly handy—allowing me to switch between different cleaning angles without rummaging through my toolkit.
The high-hardness bristles are firm enough to dislodge stubborn dirt, yet soft enough to avoid damaging sensitive components.
The anti-static feature is a game-changer. I tested it on a few static-sensitive parts, and it genuinely maintains a safe environment for electronics.
The handle fits comfortably in your hand and has an anti-slip grip, which makes even longer cleaning sessions feel less fatiguing. Plus, the lightweight build means I can toss it into my bag without any hassle.
Using this brush, I could easily clean between tiny chips and connectors that usually require a toothpick or compressed air. It’s small enough to reach tight spots but sturdy enough to make a noticeable difference in cleanliness.
The ergonomic design really helps me control the brush, reducing accidental slips or scratches.
Overall, it’s a simple tool, but it solves common frustrations—like cleaning without static risk or scratching delicate surfaces. It’s become my go-to for motherboard and phone cleaning, especially for those tricky spots.
Electrical Waterproof Glue & PCB Varnish
- ✓ Clear, seamless coverage
- ✓ Excellent moisture barrier
- ✓ Easy to apply evenly
- ✕ Slightly limited color options
- ✕ Not suitable for high-temperature areas
| Coating Type | Conformal coating for PCB protection |
| Transparency | Clear, seamless coverage maintaining PCB visibility |
| Moisture Resistance | Effective moisture barrier preventing ingress and oxidation |
| Application Method | Promotes even liquid spread with minimal streaks or gaps |
| Portability | Lightweight and compact design for easy transport and outdoor use |
| Intended Uses | PCB repair, electronic device fixing, industrial, automotive, and appliance maintenance |
Stumbling upon this waterproof PCB glue felt like discovering a secret weapon for electronics repair. I was skeptically expecting a messy, streaky coating, but what I got was a crystal-clear layer that practically vanished once dry.
The first thing that caught my eye was how transparent the conformal coating is. It doesn’t obscure any labels or circuit details, making it perfect for ongoing maintenance or troubleshooting.
It’s almost like it’s not even there, which is a huge plus when you need visibility.
Applying the glue was surprisingly straightforward. It spreads evenly without leaving streaks or gaps, thanks to its smooth liquid consistency.
Even in tight spots or around complex components, I had no trouble getting a consistent coating.
What truly impressed me was the moisture barrier. After testing in humid conditions, I noticed no oxidation or dust buildup—just reliable, stable performance.
It feels sturdy once cured but remains lightweight, so it’s easy to handle and store, even in smaller toolkits.
This glue isn’t just for motherboards; I used it on some automotive sensors and small appliances, and it held up well. It’s versatile, reliable, and offers peace of mind for both DIYers and professionals tackling demanding environments.
All in all, this waterproof conformal coating is a game-changer for anyone needing a transparent, moisture-proof seal that doesn’t compromise visibility or ease of use. Definitely a go-to for protecting delicate electronics long-term.
CPU Glue Removal Tool, 2Set TE-018 5 in 1 IC Chip Repair

- ✓ Sturdy, flexible steel blades
- ✓ Comfortable ergonomic design
- ✓ Multi-purpose application
- ✕ Slightly pricey
- ✕ Requires careful handling
| Blade Material | Flexible steel (SK5) |
| Blade Type | Double-headed |
| Application Range | Mobile phone CPU disassembly, motherboard repair, hardware repair, instrument repair |
| Intended Use | BGA repair, solder joint separation, mobile phone CPU chip removal |
| Set Composition | 2-piece repair tool set |
| Brand | VBESTLIFE |
Ever wrestled with stubborn CPU glue that just won’t let go without risking damage? I’ve been there, fumbling with flimsy tools that bend or break mid-task.
That changed completely when I grabbed the CPU Glue Removal Tool, 2Set TE-018 5 in 1 IC Chip Repair from VBESTLIFE.
This set feels solid right out of the box. The blades are made of flexible steel—sturdy enough to bend without deforming, yet sharp enough to cut through that tough motherboard glue.
The double-headed SK5 blades are a game changer for separating solder joints or lifting chips with precision.
What really impressed me is how comfortable it feels in hand. The humanized design offers a good grip, making delicate disassembly less nerve-wracking.
I used it on a mobile phone motherboard, and the versatile application meant I could handle both CPU disassembly and hardware repairs smoothly.
The blades are thin but resilient, allowing me to work in tight spaces without fear of snapping. Plus, the wide range of applications—motherboard repair, instrument repair, even hardware fixes—means it’s a multi-purpose tool that’s worth keeping around.
Overall, it’s a professional-grade kit that simplifies complicated repairs, especially for BGA and solder joint tasks. Once you get the hang of the blades, you’ll find it makes disassembly safer and faster.
No more guesswork or accidental damage—just clean, precise work every time.
What Are the Different Types of Glue Suitable for Motherboards?
The best types of glue for motherboards are:
- Epoxy Adhesive: Epoxy adhesives are strong, durable, and create a rigid bond that can withstand temperature changes and vibrations. They are ideal for repairing components on motherboards, as they provide excellent electrical insulation and mechanical strength.
- Silicone Adhesive: Silicone adhesives are flexible and provide good adhesion to a variety of surfaces, making them suitable for applications where some movement is expected. They are also resistant to moisture and temperature variations, which is essential for protecting electronic components.
- Super Glue (Cyanoacrylate): Super glue is known for its quick-setting properties and strong bond, making it useful for minor repairs on motherboards. However, it is not recommended for large areas or components that require flexibility, as it can become brittle over time.
- Hot Glue: Hot glue is easy to work with and allows for temporary fixes due to its repositionable nature before it cools. While it may not be the strongest option for long-term repairs, it can be useful for securing loose components or wires temporarily.
- Conductive Adhesive: Conductive adhesives contain metal particles that allow for electrical conductivity, making them suitable for repairing traces or connections on a motherboard. They are a great option for fixing broken circuits without needing soldering, although they may not provide the same strength as other adhesives.
How Does Epoxy Adhesive Compare to Other Glues for Motherboard Repairs?
| Adhesive Type | Strength | Curing Time | Best Use Cases | Temperature Resistance | Conductivity |
|---|---|---|---|---|---|
| Epoxy Adhesive | High strength and durability, ideal for electronic components. | 24 hours for full cure, quick set time. | Best for motherboard repairs due to its electrical insulation properties. Recommended brands: Loctite Epoxy, J-B Weld. | -40°C to 120°C | Non-conductive |
| Super Glue | Strong initial bond but can become brittle over time. | Fast curing, usually within minutes. | Suitable for minor repairs but not ideal for high-stress applications. | -40°C to 80°C | Non-conductive |
| PVA Glue | Moderate strength, not recommended for electronics. | Dries relatively slowly, requiring several hours. | Best for wood and paper, not suitable for motherboard repairs. | 0°C to 60°C | Non-conductive |
| Silicone Adhesive | Flexible bond, good resistance to temperature changes. | Takes longer to cure, usually 24 hours. | Useful for sealing but not for structural repairs on motherboards. | -50°C to 150°C | Non-conductive |
What Should You Consider When Selecting Glue for Motherboard Repairs?
When selecting glue for motherboard repairs, several factors must be considered to ensure effective and safe bonding.
- Conductivity: It is crucial to choose a glue that is non-conductive to prevent short circuits on the motherboard. Conductive glues can inadvertently create pathways for electricity, leading to component failure.
- Temperature Resistance: The glue should withstand the heat generated by the motherboard during operation. High-temperature resistance is necessary to maintain the integrity of the bond without breaking down when exposed to heat.
- Flexibility: A flexible adhesive is important as motherboards experience vibrations and movements. A rigid glue may crack or break under stress, while a flexible one can accommodate minor shifts.
- Cure Time: Consider the curing time of the glue; some adhesives set quickly, while others may take longer to achieve full strength. A faster curing time can be beneficial for quick repairs, but it’s essential to ensure that the bond is strong enough to hold components securely.
- Ease of Application: The application method of the glue should be user-friendly, allowing for precision in small areas. A glue that comes with a nozzle or applicator can facilitate accurate placement without excess mess.
- Compatibility: Ensure the glue is compatible with the materials of the motherboard and components being repaired. Some adhesives may not bond well with specific plastics or metals used in electronics.
- Safety: Selecting a glue with low toxicity and strong fumes is critical, especially for repairs done in enclosed spaces. Non-toxic options reduce health risks during application and curing.
- Durability: The adhesive should provide a long-lasting bond that can withstand environmental factors such as humidity and dust. A durable glue ensures that repairs remain intact over time, even under challenging conditions.
What Are the Essential Properties of Glue for Electronics?
The essential properties of glue for electronics, particularly for motherboards, include:
- Electrical Insulation: The glue must effectively insulate against electrical current to prevent short circuits and protect sensitive components on the motherboard.
- Thermal Stability: It should withstand high temperatures generated by electronic components without degrading, ensuring reliability and longevity in performance.
- Adhesion Strength: The adhesive needs to form a strong bond that can hold components in place under various conditions, including vibration and thermal cycling.
- Flexibility: A certain degree of flexibility is important to accommodate thermal expansion and contraction of materials, reducing the risk of cracking or breaking.
- Chemical Resistance: The glue should resist common chemicals and solvents to prevent degradation from exposure during manufacturing processes or daily use.
- Low Viscosity: An ideal glue should have low viscosity to ensure even application and penetration into small gaps, promoting a strong bond.
Electrical Insulation: Glue used in electronics must be an effective insulator to prevent electrical current from passing through, which could lead to short circuits. This property is crucial for maintaining the integrity and functionality of the motherboard and other electronic components.
Thermal Stability: Given that motherboards operate at varying temperatures, the adhesive needs to withstand these conditions without losing its properties. Adhesives that degrade at high temperatures can lead to component failure, making thermal stability a critical characteristic.
Adhesion Strength: The adhesive must bond strongly to both the motherboard and the components it holds, as a weak bond could result in parts coming loose during operation. This strength is essential to ensure that connections remain secure, especially in mobile or high-vibration applications.
Flexibility: A flexible adhesive allows for some movement between bonded parts, which is important due to the expansion and contraction that occurs with temperature changes. This flexibility helps maintain the integrity of the bond and reduces the likelihood of cracking under stress.
Chemical Resistance: The adhesive should resist degradation from common chemicals, such as cleaning agents or solvents, that may come into contact with the motherboard during assembly or maintenance. This resistance ensures that the adhesive remains effective over the device’s lifespan.
Low Viscosity: Low viscosity adhesives can easily flow into small gaps between components, ensuring a thorough bond. This property is particularly important in electronic applications where precision is necessary to avoid interference with component functionality.
How Can You Effectively Apply Glue on a Motherboard?
To effectively apply glue on a motherboard, it is crucial to choose the right type of adhesive and follow proper techniques for application.
- Epoxy Adhesive: Epoxy is a strong, durable adhesive that can withstand high temperatures, making it ideal for use on motherboards. It forms a rigid bond and is resistant to moisture and chemicals, ensuring long-lasting repairs.
- Silicone Adhesive: Silicone adhesive is flexible and can absorb vibrations, which is beneficial in electronic applications. It is also resistant to heat and moisture, making it suitable for areas that might experience thermal expansion or contraction.
- PVA Glue: Polyvinyl acetate (PVA) glue is a water-based adhesive that is easy to use and clean up. While it is not as strong as epoxy or silicone, it can be effective for light bonding tasks on non-critical components of a motherboard.
- Conductive Adhesive: This type of adhesive contains conductive materials that allow electrical current to pass through the bond. It is essential for repairing traces on a circuit board where electrical conductivity is necessary, ensuring the functionality of the repaired area.
- Application Tools: Using the right tools, such as a precision applicator or a fine brush, can help control the amount of glue applied. This precision is vital to avoid excess glue that could cause short circuits or damage other components on the motherboard.
- Preparation and Cleaning: Before applying glue, it is important to clean the surface of the motherboard thoroughly to remove any dust, oils, or residues. This ensures a better bond and prevents potential failure of the adhesive due to contaminants.
What Precautions Must Be Taken When Using Glue on Electronics?
When using glue on electronics, particularly motherboards, specific precautions are essential to protect components and ensure effective adhesion:
- Choose the Right Type of Glue: It is crucial to select a glue specifically designed for electronics, such as epoxy or cyanoacrylate, which can withstand heat and electrical conductivity. Using inappropriate adhesives can damage sensitive components or result in poor adhesion.
- Apply in a Well-Ventilated Area: Many adhesives release fumes that can be harmful if inhaled, making it important to work in a space with good ventilation. This not only protects your health but also reduces the risk of fumes affecting electronic components.
- Use Sparingly: Excess glue can overflow onto other parts of the motherboard, potentially causing short circuits or damaging connections. Applying a small amount of adhesive with precision helps to avoid complications.
- Allow Proper Curing Time: Different types of glue have varying curing times, and it’s important to allow sufficient time for the adhesive to fully set before powering on the device. This ensures that the glue has bonded properly and reduces the risk of failure.
- Avoid Contact with Electrical Contacts: Care should be taken to keep glue away from any electrical pads or contact points to prevent interference with the electrical pathways. If glue contaminates these areas, it can lead to short circuits or malfunctioning components.
- Test Adhesive Compatibility: Before applying glue to the entire area, test a small, inconspicuous section to ensure that the adhesive does not react negatively with the materials on the motherboard. This precaution helps to prevent unexpected damage or degradation.
What Common Mistakes Should You Avoid When Gluing a Motherboard?
When gluing a motherboard, it’s essential to avoid common mistakes to ensure proper adhesion and functionality.
- Using the Wrong Type of Glue: Selecting an inappropriate adhesive can lead to poor bonding or damage to sensitive components. Epoxy or silicone-based glues are typically recommended, as they provide strong adhesion without conducting electricity, unlike super glue which can be too brittle and may not withstand heat.
- Applying Excessive Glue: Overapplication can lead to glue seeping into areas where it shouldn’t be, potentially causing shorts or other electrical issues. It’s crucial to apply a thin, even layer to ensure a secure bond without creating a mess.
- Neglecting Surface Preparation: Failing to clean the surfaces before applying glue can result in weak adhesion. Dust, grease, or old adhesive residues can prevent the new glue from bonding effectively, so it’s important to thoroughly clean and dry the surfaces.
- Ignoring Cure Time: Rushing the process by not allowing adequate cure time can compromise the strength of the bond. Each adhesive has a specific curing time that should be followed to ensure the glue has fully set before handling the motherboard.
- Not Testing After Application: Skipping a functionality test after gluing can lead to overlooking potential issues. It’s vital to verify that all components are working correctly before finalizing the assembly to avoid future complications.
How Can You Ensure Long-lasting Bonds After Gluing a Motherboard?
- Epoxy: Epoxy is a two-part adhesive that provides a strong and durable bond, making it an excellent choice for gluing motherboards. Once cured, it can withstand heat and vibration, which is crucial for electronic components.
- Silicone Adhesive: Silicone adhesives are flexible and can absorb shock, making them ideal for electronic applications where movement may occur. They also offer good resistance to moisture, which can help protect the motherboard from damage over time.
- Hot Glue: Hot glue is quick to apply and sets rapidly, but it may not provide the strength needed for heavy components. It can be useful for temporary fixes or securing lightweight parts, but care should be taken with heat-sensitive areas.
- Super Glue (Cyanoacrylate): Super glue can create a strong bond in a short period, making it a convenient option for quick repairs. However, it can become brittle over time, so it is best used for small, non-load-bearing components.
- Conductive Adhesive: Conductive adhesives are specially designed for electronic applications, allowing for electrical connections while also providing a strong bond. This type of adhesive is particularly useful for attaching components that require electrical conductivity.